How many bromeliads does it take to satisfy an enthusiast?
3,500 and then some.
That is an approximation of how many species of bromeliads there are in the world. A good 95% of them are found in Central and South America. But no matter which ones you prefer, eventually you may want to enlarge your collection from the bromeliads you already have at home.
Well, there’s good news, and there’s bad news.
The bad news is bromeliads are monocarpic, meaning they only flower once, and then they die. The good news is that before they die, the parent plant will start to produce what are known as “pups,” small versions of themselves that grow from the base of the plant.
These pups are your ticket to ensuring the survival of your collection while increasing its numbers.
The object of this tutorial is to illustrate how to locate and identify the pups, when to harvest them, and how to plant and care for them.
We will be using a few species from the Kapnick Brazilian Garden here at Naples Botanical Garden for this demonstration.

Let’s start by looking for young pups of various sizes.
Here, we can see a variety of young pups developing on the base of the mother plant. They range from the embryonic to the almost harvestable.
As a rule, when a pup reaches a third of the size of the parent, it is ready for collecting. Care must be taken when removing the pup from the parent. It is sometimes better to cut the parent away from the pup rather than the pup from the parent. If possible, try to leave some of the original root attached to the young pup. But no worries if you can’t. As long as you leave a substantial amount of stem and allow it to callus over, the pup can either be planted directly into the soil or attached to a tree where it will eventually put out roots and establish itself.
Because bromeliads are epiphytes, the roots are mainly used for anchoring the plant in place rather than drawing up nutrients from the soil. So many of them will be quite happy finding a new home on the side of a tree, just as they are on the ground.
Let’s break down the process step by step:
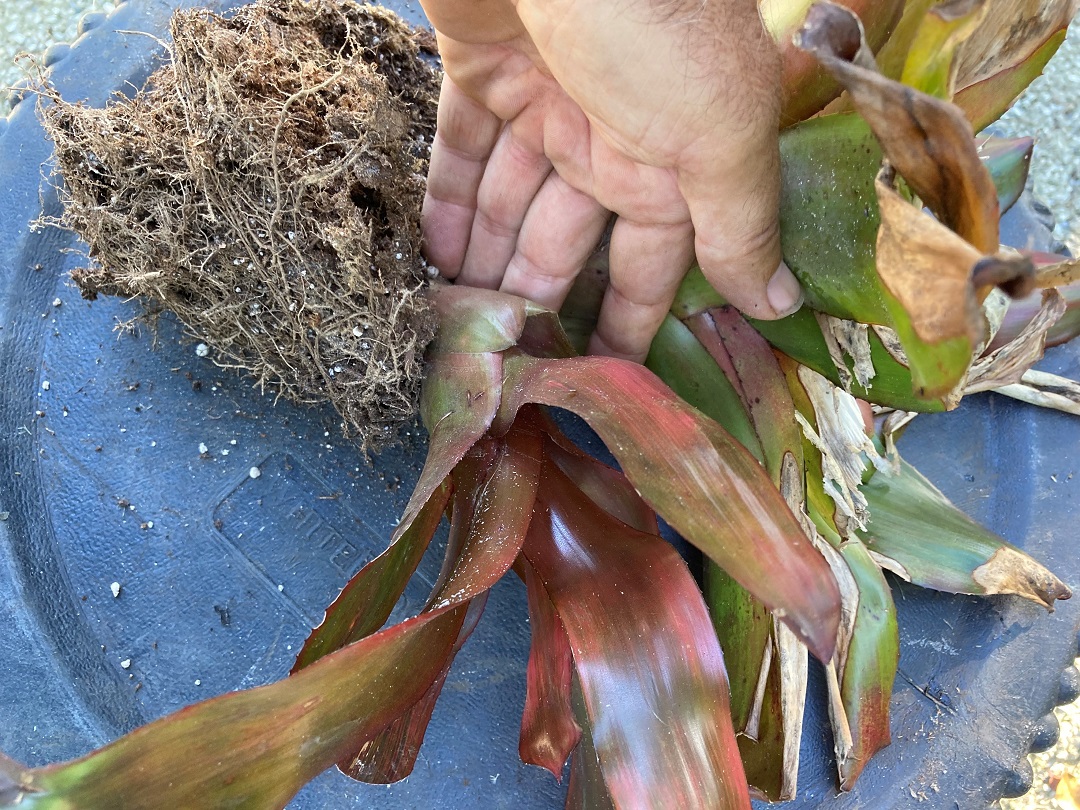
Here, we have a bromeliad well past its prime, but hidden underneath is a well-developed pup ready for transplanting.

So, taking a sterile knife, find where the pup joins the mother, and separate the two with a clean cut. If possible, try to take some of the original root along with it.

Once you have separated them, you can wash the cutting in clean water to remove any old soil.
This will help prevent any fungal infection. Allow the cut to sit exposed to air for a day to callus over.


Now you are ready to plant your bromeliad or attach it to a tree. If you choose to attach it to a tree, make sure the roots have contact with a branch, and then zip tie it into place firmly and securely to prevent any motion that will stop the new roots from adhering to the bark.

To pot it or plant directly in the ground, plant it no deeper than the root crown to avoid rot. Best to keep the leaves clear of the soil.

Once you’ve planted it, give it a good watering to set the soil around it and to drive out any air pockets that might dry the roots.
It’s as easy as that.
Bromeliads are very forgiving, provided you place them in the proper environment, and follow some simple rules. Don’t overwater them. As long as their tank — the hollow, cup-like structure at the plant’s center — has water in it, they are fine. Keep the shade-tolerant species out of direct sunlight and the sun lovers out in the open for their best performances. A general rule: If the leaves are soft and delicate, they most likely want shade. If they are stiff, waxy and thorny, then bright sunlight is in order.
We at the Garden hope that this has been helpful and wish you good luck with your divisions. Happy gardening.

 About the Author
David Chadwick is a horticulturist who oversees the Kapnick Brazilian Garden. He relocated to Naples after a career at Central Park in Manhattan and Prospect Park in Brooklyn and is enjoying his new learning experience here in the subtropics.

